21 September 2016

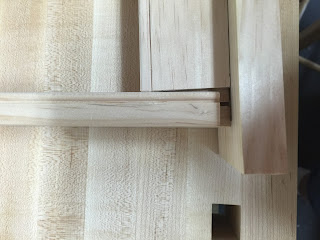
Sorry I haven't written in a while.  Life has been busy in a good sense.  I have been woodworking on a regular basis.  I'm finding I need to do a better job of aligning my photos with what I then go and do the typing on.  Two different machines result in me taking photos but then not writing about it because it's just inconvenient enough to post the photos. 

I have:
  • reorganized the bench tool locations (flows a bit more nicely)
  • ordered some Sheffield steel chisels (complete set 1/8 to 1" in eigth increments; heard I can get them sharper than my O2 chisels).
  • Finished my first Paul Sellers designed clock (was very happy with it).
  • Started another wall clock of same style (let's me focus on getting better)
  • Went to a local Lie-Nielsen tool event and spent more than I should have (though mostly from my list of tools I still wanted)
  • Installed LED under cabinet lighting above my bench (makes a big difference)
I can't wait till summer is gone and the fall is back.  I have a work bonus coming soon.  I will use a portion of that money to but an appropriately sized portable AC unit for the garage so that it will be more comfortable to work.

Of course, I don't think anyone is reading my blog postings (yet, I hope) so mostly I just feel guilty to myself for not documenting stuff.


14 July 2016

I think I have nearly all the tools I need for a lifetime of use


I think I’m nearly done with the tools I need (and want).  I did start off carefully and slowly buying the initial tools.  For about the first 4 months I had a truly minimal set.  Then, over the next 4 months or so, I flushed out the collection via eBay mostly.  I’m sure I could come up with more wants and needs but I don’t really have much desire.  At this point, I don’t feel that I am really lacking when it comes to making.  Mostly I want to save my money to buy wood to make stuff and to take training classes.  Below is what I still want to get and what I have.  Do you see any large gaps?  By the way, books don’t count.  I like books and I can easily see buying 20 or 30 wood books over the next couple of years.
 
What about power tools?  Well, for now I will hold off.  It's mostly a 3 to 5 micron wood dust thing that concerns me (probably will expand on at some point).  If I do get some power tools, I will first want a really good effective dust extraction system.  In terms of tools, I will most likely to with a ShopSmith Mark VII.  What I really like about it is that it doesn't take up too much space.  I have real issues with things take up lots of space.  I have the space mind you, I just hate filling it up.


Here's what is left on list of wants

  • Scrub plan (I do want to work from rough lumber)
  • Lie Nielsen dowel maker
  • Lie Nielsen tongue and groove all in one tool (have many book shelves to build and want to make it easy to construct the backs)
  • Sterling tool works robu curves
  • Saw tooth setter
  • A few more clamps (I only have four).
  • Miter saw and miter box


Here's what I have
Layout

  • 6” and 12” engineering squares
  • Sliding bevel “square”
  • Ruler
  • Tape measure
  • Marking knife
  • Two marking gauges
  • Dovetail marking guide
  • Compass
  • Dividers


Chisels

  • ¼”, ½”, ¾”, 1” bevel edge
  • ¼” and ½” mortise chisels
  • Number 8 straight gouge about 1&1/4”


Planes
  • No 4
  • No 4&1/2 (yes redundant and I would not own both again)
  • No 8
  • Large router
  • Small router
  • Plough plane and a beading bit
  • Spoke shave (two; again, made a mistake and really only need one)
  • Draw knife


Other stuff

  • Workbench
  • Hand drill and bits
  • 6” brace drill and bits
  • Scraper (that 3x5 ish piece of metal)
  • Dovetail saw
  • Tennon saw
  • Coping saw
  • Generic new saw that can’t be resharpened
  • Old Diston saw from back of my dad’s truck that needs to be restored
  • Diamond sharpening stones
  • Leather strop
  • Mallet
  • Square awl
  • Gauge to determine an angle
  • Screwdrivers
  • Safety glasses and ear plugs


08 July 2016

You spin my right round .... Seller's style wall clock roundovers

Before I get to fixing the panel length (and possibly width), I decided to do the round overs on the top and bottom piece.  It looked easy watching Paul Sellers do it but then again, everything he does looks easy.  So, I tried it.  It was easy.  Now, they aren't quite uniform in how they are rounded over but I'm still quite happy with it for my first attempt.  Also, besides me (and my dad), I suspect most folks won't be looking that carefully.


There will be a clock number two (and possibly a number three at some point as well).  Doing these builds several times over allows me see if I can do each successive item a bit better.  Also, I know the joints on the clock will help me for making cabinet frames and shelves (and I have several things in mind that I want to build in this area).  Case in point are the tool caddy's shown below.  The extras will be used as holiday gifts.  And who doesn't want a nice handcrafted item as a gift.


05 July 2016

Maybe get a little blister on your finger ..... Seller's wall clock continues

I was able to spend a good amount of the time in the garage woodworking this past weekend.  I was able to move on to do the final few steps of wood working.  I cut out the panel and then marked the lines for making a raised panel as well as the location of the clock.  I figured it was better to mark off the clock location now while everything was full sized stock.  This was me trying to apply a lesson from earlier in the clock making.  I had put in the beads before making off the final length and I had some issues scribing my lines when not all was square.  I'm sure it will be something I outgrow.  Till then, I figure it can't hurt to try and mark with full dimensional material when possible.


As for making the raised panel with my hand plane.  It wasn't too bad.  I didn't get crisp clean diagonals (most easy to see in the last photo) where the two directions meet.  Given it's my first time doing this, I was happy.  Also, since I needed to narrow the width on both sides to fit the grooved, rails and stiles, I decided to put a raised panel on each side.  It gave me more practice.


It was a bit harder than I thought it would be to get the panel edges thin enough to fit into the grooves but I was patient.  I apparently made the panel to wide and tall.  I more or less got the width adjusted by planning the same number of strokes on each side so it stay centered.  It was also too tall by about a quarter of an inch.  I will have to measure more carefully (though I thought I had).  I was getting tired at that point so I stopped and will finish getting it to fit at a later day.  When I'm tired I'm more likely to do something wrong.


Prior to discovering the panel fit issue, I cut out the hole for the clock face using my coping saw.  It wasn't that hard to do but getting the coping saw blade reinstalled when I put it through the panel was a bit difficult.  The kind of thing where you need three hands a pet monkey to help you out.  Again, deep breath, be patient and all works out.  After cutting the hole out, I took a rasp to clean the hole so it looks clean and tidy.  Not that anyone would see it.  Just my peace of mind.  Something I was proud of - I didn't have a compass to draw a circle so I needed to buy one.  I went online to see if there was any info on what works well and what doesn't.  If you were to believe the internet, a $100ish Starett compass is what is needed.  I didn't want to spend that much.  At WoodCraft, I bought a $7 compass and it worked just fine for me.  Again, being a newbie, I know some tools are junk and some aren't.  Glad I tried the inexpensive option first.  I also make it a point to tell the wife how I "saved" money but not buying the most expensive option first.  Maybe if I made lots of holes all day and needed tight tolerances, there would be a more suitable tool.  For my needs, I think I am done with getting a compass.


All in all a good day.  A day working in the shop beats a day on the couch.  The next day, my index finger was hurting and I couldn't figure out why.  I had used the plane so much I had a blister forming.  It brought a smile to my face. 

30 June 2016

won't need to buy new wood for a while

I'm currently building the Paul Seller's style clock that he has posted on YouTube.  I've enjoyed the build and have maybe one or two afternoons of work left. 

One of the things I'm trying really hard to do is not get too far ahead of myself in projects or buying things.  I don't  like having lots of unfinished or unstarted projects laying around.  It stresses me out.  That I'm sure has origins from my upbringing.  My father is a wonderful man; however, he is the king of unfinished projects and that used to bother me.

The list has grow long enough where I won't need to buy wood for a while.  Below is a list of known projects that I have everything I need to get it done.

1.  Make another clock.  I miscalculated when I bought the board for the first clock and I have enough wood to make a second one.  I'm excited about this.  I wanted to make at least two if not three of these clocks (first one just gives me the experience and let me knows what the challenges were for me, the second let's me focus more on the challenges, the third is fun as I have a much higher degree of confidence I can build it up to the level of my newbie abilities).

2. Make some more dogs for my bench.  I have enough scrap laying about that I can cut a few more square dogs for the bench rather than buying them at $25 each.  Only part I don't quite have figured out is how to get a bit of wood springy on the side so the dog stay us.  Good problem to solve.

3.  I need to make a wood base to go onto my hand powered non-electrical router.  I like the one I have but I find the metal base leaves scratches on the wood.  I'm sure it's a technique fault on my end but I have a scrap piece of cherry that just fits.

4.  Install LED lights under the cabinets under the bench.  The garage is well lit but I'd still like more light at the bench.  One job I worked at moved us into new offices but I found it dim in my cubicle.  So, I purchased some $50 worth of under cabinet LED lighting.  When I left the job, I took the lights with me as they were mine.  They would go well above the bench and under the cabinets there. 

5.  Reorganize the cabinets a bit.  I initially remodeled the garage with power tools in mind.  As such, I put in a lot of cabinets that were tall.  Since I decided to go the hand tool route, there isn't much in them and they are poorly organized.  If I spend some time on this, I can have some hand tool items that don't go on the peg board really handy.  Also, there is a secondary card table in the garage for house hold type tools and items that can reside in the cabinets which will free up space in the garage.  I like a neat and tidy garage and doing this goes a long way towards piece of mind for me.

6.  Reorganize the hand tools in front of the work bench.  Now that I have been working with them for six months, I have a better idea of what I grab often and that which I don't and where along the span of the 8' bench I work.  I don't think I need I will be buying too many more tools so it's a good time to do this.  Again, peace of mind.  When I come home in the evening, even if I can't do any woodworking, just seeing it organize and ready for my use brings great peace of mind.  I don't know why this is so.  Maybe it has to do with the whirlwind of life and there is much I can't control and this one little place is my fortress of solitude for the rest of the world.

7.  Pull nails and sort the wood left from the old fence.  It's just laying in a heap in the back yard.  Also, the workers were (un)kind enough to leave the pressure treated wood.  I want that gone.  Being a chemist, having wood that contains chromium and arsenic soaked into revolts me.  I don't care what the studies say about it mostly staying put.  Nope, it must go and I will be happy when the wood I want to keep is tidy and the pressure treated wood is gone.

24 June 2016

my first visit to Woodcraft

I had never been to a woodcraft store.  My dad has and had said many nice things about it.  It being father's day weekend, it seemed like a good way to spend a few hours with my dad.  Needless to say I was impressed and giddy all at once.  I have gone online and looked at their items.  There is something to be said for seeing items in person. 

There were two things that I really liked there:
1. They had lots of books/magainzes on how to make things and various designs.  I like to flip through pages before I buy books and this was definitely helpful.  I will be back to this.

2. They have a nice lumber selection.  The lumber store nearer to my home has a very nice but somewhat limited selection of wood types.  At Woodcraft, there were many different kinds of woods.  I can see if I am looking for something a little different, I can probably find it here.

In terms of money spent, I behaved.  I bought an inexpensive compass that I need to draw a circle so I can then cut out the hole for the Paul Sellers clock I've been working on.  I opted to get the $8 general brand one.  If it fails me, then I will consider upgrading.  Also, I found a nice piece of straight grain ash that is 3"x3"x12".  It was $14ish and is the perfect size for which to use to make my wooden plane.  A while ago I had bought the Veritas Norris style make your own wood plane kit.  I'm looking to making it.

21 June 2016

sharpening done simply for me


I’m trying to keep things simple.  Wood working has hotly debated topics much like all other hobbies (have an idea for a future blog I’m really looking forward to writing that addresses this topic in deail).  After using the tools for 6 months, I felt that I needed to sharpen the blades.  There are a million options on how to sharpen woodworking tools.  Some of these are quite complex.  With my other hobbies, I dislike complex.  I wanted to keep it simples.  Well, this is where I really like Paul Sellers.  He has been woodworking for 50 years as a profession.  In his videos and in his book, he basically has tried all of the systems.  He settled on diamond stones and created a simple gig to hold them which I copied.  I used birtic balch plywood and double sided tape then little wood strips I nailed in.  I set the offsets of the strips of wood so that I have predefined distances I can use to set my sharpening gig to so I can get either 25 or 30 C grind angles.  I eventually want to get away from using any The strope was just as easy to make.  What I really like about Paul Sellers in general is that he has done this for 50 years as a full time job and can attest to what is practical and quick.  I trust him.  Others may want to sharpen a different way and that is fine by me.  I’ve made a decision on the topic, spent the money, and built the sharpening station so I no longer need to think about it.  It felt nice to build this.  The first sharpening went well.

17 June 2016

Found a use for old wood from my backyard fence


At a recent fair we went to, I saw this potting stand.  My wife has been asking me to build one for her.  We needed to have the fence in the backyard rebuilt and  we saved the rustic weathered wood.  I’ve had a few ideas for which using rustic wood would be great.  Seeing this potting stand has sealed the deal.  Not only will my wife get something that she wants, I will be repurposing/recycling what have would have been considered junk wood and likely destined for land fill or compost.  Everyone wins.  I don’t need to build a replica of this.  This inspired the idea though.

14 June 2016

More work on Paul Sellers style wall clock


I was able to spend some more time in the workshop.  This week I was able to put the grooves in the stiles and rails (front and side pieces of the clock face).  For this, I used a handy little Veritas plough plane.  The same one I had used to make the grooves.  All I needed to do was swap out the ¼” plough blade and put in the 3/8” groove blade.  In the span of the four pieces of wood I needed to groove, I really felt like I came to a much better understanding of how much depth the blade needs to have in order get thin shavings.  There was still a bit of tear out but it isn’t that bad.  For my first time doing this, I am quite happy with the results. Used a little sandpaper afterwards to smooth some things out.


The other thing I did was cut the little stubby tennons.  It went reasonably well and I learned where to have the beaded part of the wood located in order to avoid some tearout.  I then tried to assemble everything.  The tennons seem to be thin enough.  However, I can get everything reassembled.  I was a bit frustrated and put everything down.  I will go back to it when I feel a bit more calm so I don’t muscle or force things.  If I had to guess, I think that the front side might be a wee bit too long (tennon seems shallow enough to fit the groove).  I will be able to test this by holding this piece and the other up to each other and see if both front faces or flush or if one is long.  Not sure in the moment of frustration I would have thought to do that.  I will get this fixed.  Hopefully everything will look snug when I am done.


07 June 2016

I quite like poplar


Being new to woodworking, planeing (yet another word I am not certain to spell) things square is still a challenge.  I’m just starting to build my confidence on getting edges square (still need to concentrate hard on this).  For twists, cups, and other warped wood, it is beyond me for now.  As such I buy a lot of S4S wood at a decent local lumber yard.  Poplar costs nearly half as much as most of the S4S woods.  Often I buy it.  I gotta say that I really liking the wood.  It’s fun to work with hand tools and some of the boards can be absolutely stunning.


For example, look at this beautiful piece of poplar I found.  I wanted to put a simple shelf under my bench.  I found this one board with just stunning colors and perfect for the application (or maybe its like the proverbial baby that only a mother can love).  I kept things simple and just put some bees wax on it.  Every time I see that splash of color under my bench I smile.  I was also happy that I found an easy way to make a shelf that didn’t require any permanent alterations to the bench.  Of course, the one small piece all that way at the right end has a horrible twist it in.  That will get fixed at a future date which I have the skill to fix it.  Or, I will just put in a piece when I have some leftover poplar from another project that doesn’t have any twist.

Update 12July2023:
Not worthy of a new blog so I will just update this one.  Still have these poplar boards under the bench.  They have lost the pretty purple and green colors in them but still have nice dark shades.  I still have that twisted board and it hasn't caused any issues so I haven't bothered to replace it.  Given the length of service of it at this point, it's kind of like the runt of the litter and I am too fond of it to change it.  The boards have nice patina from use.  Nothing excessive in terms of scrapes and scratches.  Nothing has fallen off.  The system has worked well.


06 June 2016

got some woodworking done


This weekend was productive in the garage.  I am making Paul Sellers wall clock.  I bought a nice pine board at a big box store that is good enough to make two of them.  Where possible I’m making at least two, if not three items in a row.  It allows me to practice the techniques and provides Christmas items for family and friends.  I have some observations:

1.       After 6 months, I am getting pretty good a sawing to or slightly proud of a line.  My first few saw cuttings 6 months ago were crooked.  I guess it was just a matter of practice.

2.      I still can’t plane an edge square but at least I have gotten good at the last 5 strokes at making it square.  I suspect this will get easier over time. 

3.      I am noticeable more comfortable at making dados.  My first project making a hand tool carrying tote really helped as I made three of those.

4.      I will have to watch my rabbit planning and grain direction as I had some tear out.  Using a knife in the newly formed groove helped but not after some noticeable side tear out. 


Next weekend I move onto cutting the tennons, rounding over the top and bottom and fitting the panel.  Working with wood and hand tools is fun and is better than sitting on the couch watching TV.

02 June 2016

Ahhhh, now I understand what is driving my desire to work with hand tools


There are the obvious reason’s such as wanting a hobby when I retire, need furniture for the home and hate the quality of most the common stuff I can buy, my father and grandfather did some woodworking as a hobby so I grew up around it.
 
I am a chemist by training (organic chemist to be specific).  I was in school studying to be a chemist from age 18-30.  During those years, I developed really good hand (and mind) skills for working in a lab and doing research.  I really liked doing lab work and making molecules.  For the first 6 years of my career I worked in the lab.  About 12 years ago, I transitioned from working in the lab to managing folks who work in labs (that’s the simple explanation, it’s a bit more complicated but not worth the digression). 

 
I have a good job/career and look forward to work most days.  Unfortunately, I felt something nagging at me for quite a long time that I couldn’t put my finger on.  I felt a pull to woodworking I didn’t fully understand.  Reading aPaul Sellers blog made it all apparent (thank you Paul!).  I missed using my hands and those finely developed skills when I was in the lab making molecules.  I didn’t go into chemistry to manage others.  I got into it because I couldn’t imagine being anything else other than a scientist working in a lab.  I do get to live vicariously through my colleagues in the lab but it isn’t the same.


Wood working, especially with hand tools, is a way for me to develop refined skills and work with my hands again.  Now I get what was gnawing at me.  At least for me, I now understand my driver.  And that is comforting.

01 June 2016

Why I decided to buy rather than build a bench


I was thinking of making my own bench.  In fact, I bought Chris Schwartz’s book on the topic and spent a fair bit of time reading it.  Ultimately I ended up buying one.  Mostly this came down to the fact that I am an absolute beginner (couldn’t even cut a straight line) and just didn’t feel confident enough to be able to do it.  Now, six months or so into woodworking, I have that confidence and could do it.  The good news is that I have used my bench and hands tools I purchased a lot.  I did have some concern that I was going to buy this initial stuff and it would sit around unused gather dust.  Who hasn’t at some point bought something on the pricy side with the best intentions and watch it gather dust (like the treadmill we got recently so we could walk while watching tv)?  Oh, the good and bad/sad news.  I know someone close to me who had a huge tree topple over in a big storm and completely demolish their garage and workbench.  Looks like I may have an opportunity yet to build a workbench.
 
In terms of what I bought, it was the Lie Nielsen one.  Why that one?  Well, it met Chris Schwartz's criteria for a bench in terms of sturdiness, etc.  I did get to see one in person and try it out at one of their travel tool shows.  Yes, it was expensive.  However, it's done and I have it and in theory I never need to worry about this topic again.  It works well and I have been happy with it.  I debate now 6 months into it whether a tool well would be handy or a quick release vice.  Both of these are good problems to have and in all likelihood I will leave it as is and spend my energy on wood working projects.


31 May 2016

My first steps ...


For the past 14 years I had wanted to get serious about woodworking.  I grew up with my father and grandfather doing some sort of wood working (either by necessity or as a hobby).  In 2001 during a bout of unemployment, a friend of mine helped me (more like me helping him) build a desk.  Ever since I wanted to get more into woodworking.  Due to several job relocations and establishing my career, I put it off. 

In late 2012, things settled down and my wife and I bought a home with a three car garage (a non-negotiable criteria of mine).  In 2013, I remodeled the garage so that I could finally do my wood working.  I had anticipated using power tools and the remodel reflected that (lots of plugs and power in the garage).  Around that time, I started to do some serious internet searching (planning for the power tools). I bumped into Chris Schwartz blogging and wood working with hand tools just clicked.  I bought his Anarchist Tool book and spent a year reading it plus plenty of other hand tool things including Paul Sellers.  Finally in late 2015 I was ready to start making some purchases and sold a car to fund my initial tool purchases.

That catches you up to the present where I have been toiling away as time allows for the last 6 months.

The purpose of this blog is for me to document my journey in woodworking for someone of absolutely no experience to see where it takes me.  Follow along if you would like.  As in all your interactions with others, please be kind.  I am sure there will be many setbacks and foibles along the way.  I hope to share the good and the bad.