In 2001, while in between jobs, with my good friend Roger, we built a desk from a Tauton Press book. I was mostly a shop assistant but it made it clear I wanted to get serious into woodworking. In 2002, when Roger's uncle passed away, I bought a bunch of the power tools. Soon, or so I thought, I was going to be woodworking. Unfortunately, there wasn't good job stability in Washington state for the pharma/biotech industry. I grew sick and tired of this instability. As such, in 2004 I decided to move back to the San Francisco Bay Area. It was painfully expensive and I couldn't afford a home, even on a Ph.D. salary. As such, I bought a condo. The though was I would live there a few years then sell and take that equity and move up and into a home. Anyone recall 2008? My condo dropped in value to about half of what I paid for it. As such, I stayed put. In mid-2012 it had rebounded to what I paid for it and immediately sold it. The good news was that homes in the outer rim of the San Francisco Bay Area were comparable in value to what I sold the condo for. While looking, my "must have" for a home was a three car garage so I could woodwork. We found a home and bought it in late 2012. After a year in the home, it was time to remodel the garage.


Where I worked allowed you to take a fully paid sabbatical every six years for six weeks. You could also tack on an additional few weeks of vacation. As such, I had eight weeks off. The goal was to have the garage finished by the end of these two months. At that point in my life, I wasn't sure if I would be the kind of person who would finish a project or not. I now know I am but at that point, it was unclear. As such, I really wanted to make sure it got done and if required spending a bit more money rather than sweat equity, so be it. I was fortunate that I had stock options that were in the green I could sell to make this happen.

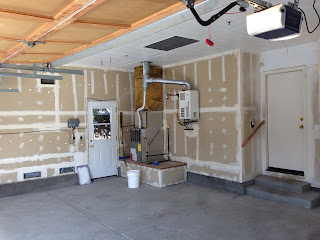
The garage was nice but it lacked several key items - inadequate lighting, no insulation, inadequate electrical outlets, and garage doors that were getting saggy. The electrical and lighting and insulation were done by professionals. I painted the ceilings and walls. With the help of my brother, father in law, and my wife's nephew we installed the cabinets. I had used 1x2's and a laser level. This provided a nice surface for us to mount the cabinets. Then, the 1x2s were used to mount the peg board - a tip/trick my friend Roger had told me about.


With that done, new highly insulated garage doors were installed. Turns out garage door technology had changed quite a bit since I had last looked at it. The motor for the garage doors didn't need to be mounted in the middle of the ceiling, they had an option to mount the motors right on the garage door wall itself. This freed up some ceiling space. After that was done, we hired a professional to put on some epoxy type flooring. After that was done, we found a company that installed overhead racks that mounted off the ceiling for increased storage space.


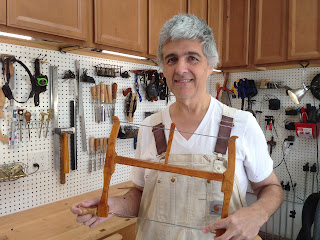
I almost got it all completed during the two months I was off from work. I could have done it for less money if I didn't have the self imposed deadline but I was worried I wouldn't finish it. With the garage done, I needed to save up to buy the tools. I was planning to go full Norm Abrams in the garage. Since I figured it would be about a year before I could afford tools, I decided to research what tools to purchase. In doing the research, I discovered hand tools and something really clicked for me. I wanted to develop the hand skills and that would be the focus rather than machines. To afford the tool bench (wasn't confident I could build one), I sold my 1990 Mustang that had started to increase in valuable and become a collectable car.
I basically work along one wall in the garage. Have some shelves in the middle for wood storage and in 2021 added air conditioning. For me, I must be able to park the cars inside the garage at night. Not sure why I am this way but I am. In 2022/3 I plan to buy a band saw and dust collector and likely a Dewalt planar. I think the only other tool I might get is a drill press. With that I will have all that I could want for.


So, this is now 2022. Any regrets. To quote Frank Sinatra, "Regrets, I have a a few but too few to mention." I'm very happy with my garage and how it turned out and I spend a lot of time in it. With Covid-19 disrupting all of our lives, it really has been my sanctuary. Sure, I would like a bigger shop in a dedicated stand alone building but I appreciate what I do have. It may or may not be where I woodwork for the remainder of my life. I don't think too hard about it. Just happy with what I have.