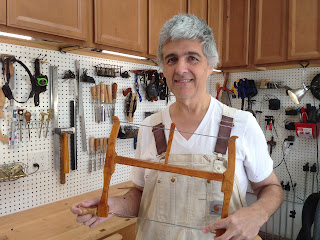
With the mortise and tenons for the bow saw (Tools for Working Wood website & Grammercy Bow Saw Kit) done, it was time to move onto curving the pieces. Not as much to write but lots of photos to share. I took my time on drawing the layouts using a mixture of dividers and French curves. It didn't need to perfectly match the plans. Just be close. I wanted the two pieces to be symmetrical. I used a mixture of stop cuts, chisels, coping saws, spoke shaves, rasps, files, sand paper, and card scrapers. They came out nice.


To glue the brass into the handles, I just used 5 minute two ton epoxy.


With all the woodworking done, it was time to apply finish. Stuck with my usual. For the cherry parts, I used 1-1/2 pound cut garnet shellac and for the handles (not sure of the wood type) I went with blond shellac. Denibbed after four coats and put on another 4 more. After a week of sitting (I think shellac hardens up a bit if you can let it sit for a few days), I waxed and buffed.


I gave it a quick use. The handles turn a bit more freely than I had expected but I will get used to that. It worked well. It will take some time to figure out how many twists to tension it. The website (Tools for Working Wood) does a good job of warning to not overtighten so I was a bit conservative with this. All in all, I am happy this is done. The next tool I build (in a few months based on other woodworking priorities), will be taking a casting I found on Jim Bode's Antique Tool website that is like the Studley tool chest mallet. Looking forward to this build. Not sure what wood I will use. Have quite a few bits laying about I could use or I could buy something specific for this project. This is a good problem to have.


Great job
ReplyDeleteBob
Thank you. Little by little my collection of home made tools grow.
Delete