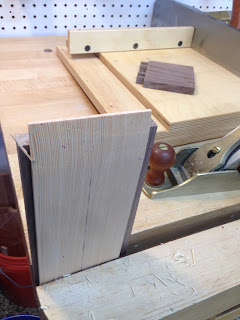
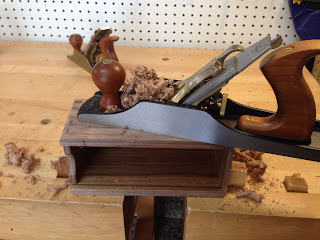
I had left over wood from my summer Port Townsend School of Woodworking class to make another walnut and VGDF box in same dimensions as the other one. Since the construction was basically the same as the post in late Sep, I want to mostly focus on the differences. Here is a quick snapshot of photos of making it and below will be the differences I want to talk about.
For the captured bottom, the first box used a machine router with stopped grooves. I don't have a machine router. Though I do want a few machines to help with donkey work, I'm not sure if I will get a machine router. Making through grooves by hand is easy with a plough plane. The only decision I had to make for this box was for the material to use for the plugs. Either use walnut (blend away the plugs) or use a different wood (to highlight this as a feature). For this box, I decided to use walnut and blend it. The next walnut box I make, I will use ebony plugs to make it a feature. I'm not embarrassed or ashamed of using through grooves or plugs - with the tools I have available this is a tell tale mark of how it was made. If I really wanted to not have grooves, I could use a 1/8th inch chisel to make stopped grooves.
I wanted to do things a bit differently on the top. The last one slide out on one side. For this one, I wanted the ability for it to slide out in two directions. Just wanted to see what that would be like in a box and only way to know for sure is to do it. As for the lid, I didn't want to put bevels on it. Simply took my plough and shoulder plane to thin if from 1/4" to 1/8" thick to go into the sides. As for the bottom, I had some 1/8" walnut and just used that for a bottom.
When I did the angles on the first box, I really liked the bevel near the bottom and how it made the box float a bit off the counter top. For this box, I just put a bevel near the bottom and left the remaining portions of the box rectilinear. I also used a different height for the bevel just to see how that impacted the overall look. It does change the look. Of the two, I think I prefer the bevel closer to the bottom. Again, not a big deal, just a preference.
As for the finish. The first box used Liberon Finish oil. Though I like the look and the fast drying time of this oil (due to metal driers added to it), I don't like the smell of the volatiles or the fact their safety data sheet is vague. As a chemist, I'm a bit fussy when it comes to smells and vaguness of chemicals. I prefer the smell of benzene to toluene, diethyl either over tetrahydrofuran, pentanes over hexanes, etc. I wanted to try a different oil. Christian Becksvoort in Fine Woodworking Issue 152 (Nov/Dec 2001), he wrote an article about Tried and True oils, specifically about their varnish oil which is partially polymerized linseed (flax seed) oil and pine resin. No driers, etc. As such, I used it. I really liked and and found the smell to be on the pleasant side of things. It does take longer to dry and less coats can be applied per unit time. Since I'm a hobby woodworker, this is fine. I did 4 coats and really liked the way it looked on walnut (darker) and felt (smooth enough where I didn't feel the need to wax the box). This will likely be the oil finish I use more often. I will use up the Liberon Finish oil on some other projects as well since it would feel wrong to waste/discard it.
And that's it. Another box in the books. I will likely use this box as a Christmas gift. I have almost enough walnut for another box and will get to that in Nov. Right now I'm working on a huge box for the my nephew's SUV to house his subwoofer. It's being made from Baltic Birch and dovetailed together. Still in progress but below are some sneak peaks. It's pushing my skills due to its size. A good problem to have.
From small to large. Keeping me busy for sure.


