19 March 2022

Making a Bow Saw Kit - Part 2

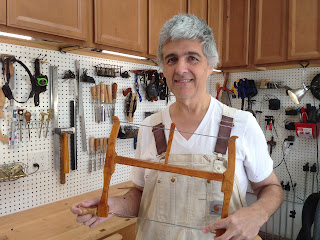
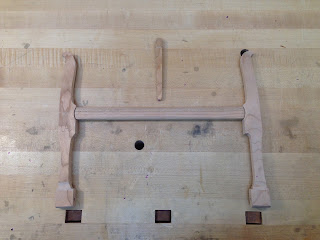
 With the mortise and tenons for the bow saw (Tools for Working Wood website & Grammercy Bow Saw Kit) done, it was time to move onto curving the pieces.  Not as much to write but lots of photos to share.  I took my time on drawing the layouts using a mixture of dividers and French curves.  It didn't need to perfectly match the plans.  Just be close.  I wanted the two pieces to be symmetrical.  I used a mixture of stop cuts, chisels, coping saws, spoke shaves, rasps, files, sand paper, and card scrapers.  They came out nice.


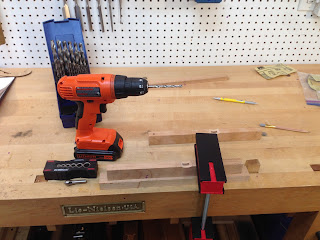
To glue the brass into the handles, I just used 5 minute two ton epoxy.  


With all the woodworking done, it was time to apply finish.  Stuck with my usual.  For the cherry parts, I used 1-1/2 pound cut garnet shellac and for the handles (not sure of the wood type) I went with blond shellac.  Denibbed after four coats and put on another 4 more.  After a week of sitting (I think shellac hardens up a bit if you can let it sit for a few days), I waxed and buffed.  


I gave it a quick use.  The handles turn a bit more freely than I had expected but I will get used to that.  It worked well.  It will take some time to figure out how many twists to tension it.  The website (Tools for Working Wood) does a good job of warning to not overtighten so I was a bit conservative with this.  All in all, I am happy this is done.  The next tool I build (in a few months based on other woodworking priorities), will be taking a casting I found on Jim Bode's Antique Tool website that is like the Studley tool chest mallet.  Looking forward to this build.  Not sure what wood I will use.  Have quite a few bits laying about I could use or I could buy something specific for this project.  This is a good problem to have.


12 March 2022

Making a Bo Saw from A Kit

I like building my own woodworking tools.  I try and build a few each year and have a good line up for this year and next.  For Christmas, I received the Grammercy bowsaw kit from the Tools for Working Wood (one of my favorite tools stores).  The kit included the 12" bows, string, brass bits to hold the blades and since I don't own a lathe, the handles.  There are great instructions and plans available on the Tools for Working Wood website.


It doesn't take much wood to build a bowsaw.  I like cherry, have plenty of straight grain cherry off cuts, and so that it what I went with.  Does it make a good wood for a bow so?  I don't know.  If it doesn't work or last, I can always make it again.


In the past 12 months (I think as it all blurs) I have made a a spoke shave and a big Roubo frame saw.  I was starting to feel a bit more comfortable shaping wood with these projects in shapes other than rectangles.  I was curious how I would feel making the shapes for this wood.  Turns out, I was comfortable.  Sure, there are imperfections.  

After cutting the wood to rectangular shapes, I did the mortises on the two side pieces.  One of the things I had struggled with in the past was making mortises by hand; so much so that I bought a table top mortiser.  For this build, I did the mortises free hand.  They came out nice.  I was happy with this and in the future I will be doing more mortises by hand.  If I have a lot to do on a particular project I might bring out the machine; otherwise, I will likely just do them by hand.     


What was interesting about these mortise and tenons was the the sides weren't straight.  Rather, they had a curve to them (supposedly to allow flex when the bowsaw is tightened).  Spent some time thinking on how was I going to get the curve consistent across the various places I need to make it.  The big insight was to use the one large gouge I had.  It worked out really well and was easy to do.  When I was cutting the curve shape on the mortise part, I put in a piece of sacrificial wood so that I wouldn't get blow out.  That worked well.  Just some minor pairing and it worked well.  The alignment wasn't as tight as I would like on a mortise and tenons but for a shop tool and my first curved ones, it will be ok.

The post is getting long so I will finish up the construction in part 2.


05 March 2022

Tea Bag Box - Part 3 Sawing Open the Carcass, Finishing, & Hardware Installation


When I took the box out of the clamps, I was happy.  While still one whole piece, I used my freshly sharpened No. 3 hand plane (my favorite size for smoothing work) to flush up the dovetails and get the top and bottom flushed and flat.  My bench is a good flat reference for this so I mostly just kept planeing and checking to see if there was any rock.  When the rock was gone, I stopped.  I tried my winding sticks as well but couldn't see any wind and the simple rocking check seemed to work.


Now came time to cut the box open.  I triple checked which side was the top vs. the bottom.  Nothing would be worse cutting open the box on the wrong side and cutting into the maple housing dividers I had put inside.  I used my mortise gauge to provide two lines 1/8th" apart.  As long as I stayed between those lines, clean up should be easy.  I slowly cut the box open with my fine joinery saw and stayed between the two lines.  Success!  Then just cleaned it up with my No 3 hand plane and made sure the two new surfaces were rocking free on the bench.


Before the finishing was applied (don't have proper photo so showing photo after I applied finish), I mortised out the hinge locations in box and lid.  For the hinges, I used Horton Brasses 90 degree stopped hinges.  I have to give a shout out to Fine Woodworking's Shop Talk Live.  I enjoy this biweekly podcast.  These stopped hinges were mentioned there rather recently.  I didn't know such things existed so I ordered them.  By using these, I didn't need to use a stop chain.  For this particular project I didn't want to use a chain so this was a perfect solution.


Now it was time to move onto the finishing.  Prior to assembly, I had finished the inside with blond shellac.  For the outside I used 1-1/2 pound cut of garnet shellac.  After 4 coats I denibbed and then put another three or so coats.  Then, I let it set up for a few days.  I find that shellac tends to harden up a bit as that final ethanol evaporates.  Then used some 0000 steel wool and wax on the outside.  I used some Minwax cherry colored "crayons" to fill the gaps.  It just makes them a bit less visible.


With this nearly complete, it was time to drill holes and install the hardware.  Given I had an oops happen, let me detail how I drill the holes for my hardware.  I use my digital calipers to measure the inside the threads distance of the stem of the screw and use the appropriate bit.  I have one of those drill it sets that go up by 64ths so I can usually find the proper side.  For the feet, I am using some Brusso brass feet to raise the bottom of the box up by like an eighth or sixteenth of an inch.  Brusso included a steel screw with the brass screws.  The error I made was that I measured the diameter of the steel screw, which I had planned to use to pre thread the holes and NOT the brass screws.  I had ASSUMED they would be the same.  It turns out that the diameter of the steel screw was larger than or just equal to the diameter of the threads on the brass screws.  As such, when I put the brass screws into the pre-drilled holes, there was no thread bite at all.  I was rather upset by this.  Shame on me for not checking the brass screws directly and shame on Brusso for having this mismatch.  My lesson learned was I will now always check the diameters of the intended screws and then check if a steel driver screws.  After I took a break to calm down, I grabbed some bamboo skewers from the kitchen, whittled them down and glued them in place.


The next day, I drilled the proper size screws for the brass feet.  Then moved onto hinges and then onto the knob.  Finished!  It took a total of 41 hours to make this.  I am fairly happy with it.  It's not perfect but it is as good as I can make things right now and that is fine.  Each project feels like I get a bit more skilled and that is all I can ask for.